Tiny version
Use this page when you want the same measurement to mean the same thing tomorrow, not just today.
Use this page when you want the same measurement to mean the same thing tomorrow, not just today.
Get the mic in a repeatable place, keep the noise floor down, run the same sweep every time, and write down what changed.
The deeper sections below are for when you need formal repeatability, competition-style comparison, or lab-grade verification instead of a quick tuning pass.
A practical measurement does not need to be perfect to be useful. It does need to be repeatable. The first goal is to create a setup you can come back to, so the next graph reflects the system change instead of a random mic move.
People often move the mic, seat, or volume between tests and then think the new graph proves the change worked. Keep the setup fixed first, then compare.
If you are comparing your own system before and after a change, a consistent in-car setup is often enough. If you are comparing products, publishing claims, or judging maximum output against formal references, that is when the standards language matters much more.
Use this for: checking target-curve drift, seeing bass humps or crossover dips, and verifying whether EQ or placement changes helped.
Relevant standards: IEC 60268-5 for loudspeaker measurement language and repeatability expectations.
Use this for: output testing, competition-style checks, and confirming the system can get loud without immediately falling apart.
For everyday tuning, the useful question is often simpler: did the system get louder cleanly, and under the same conditions as last time?
Use this for: gain setting, clipping checks, and confirming the amp reaches rated output cleanly.
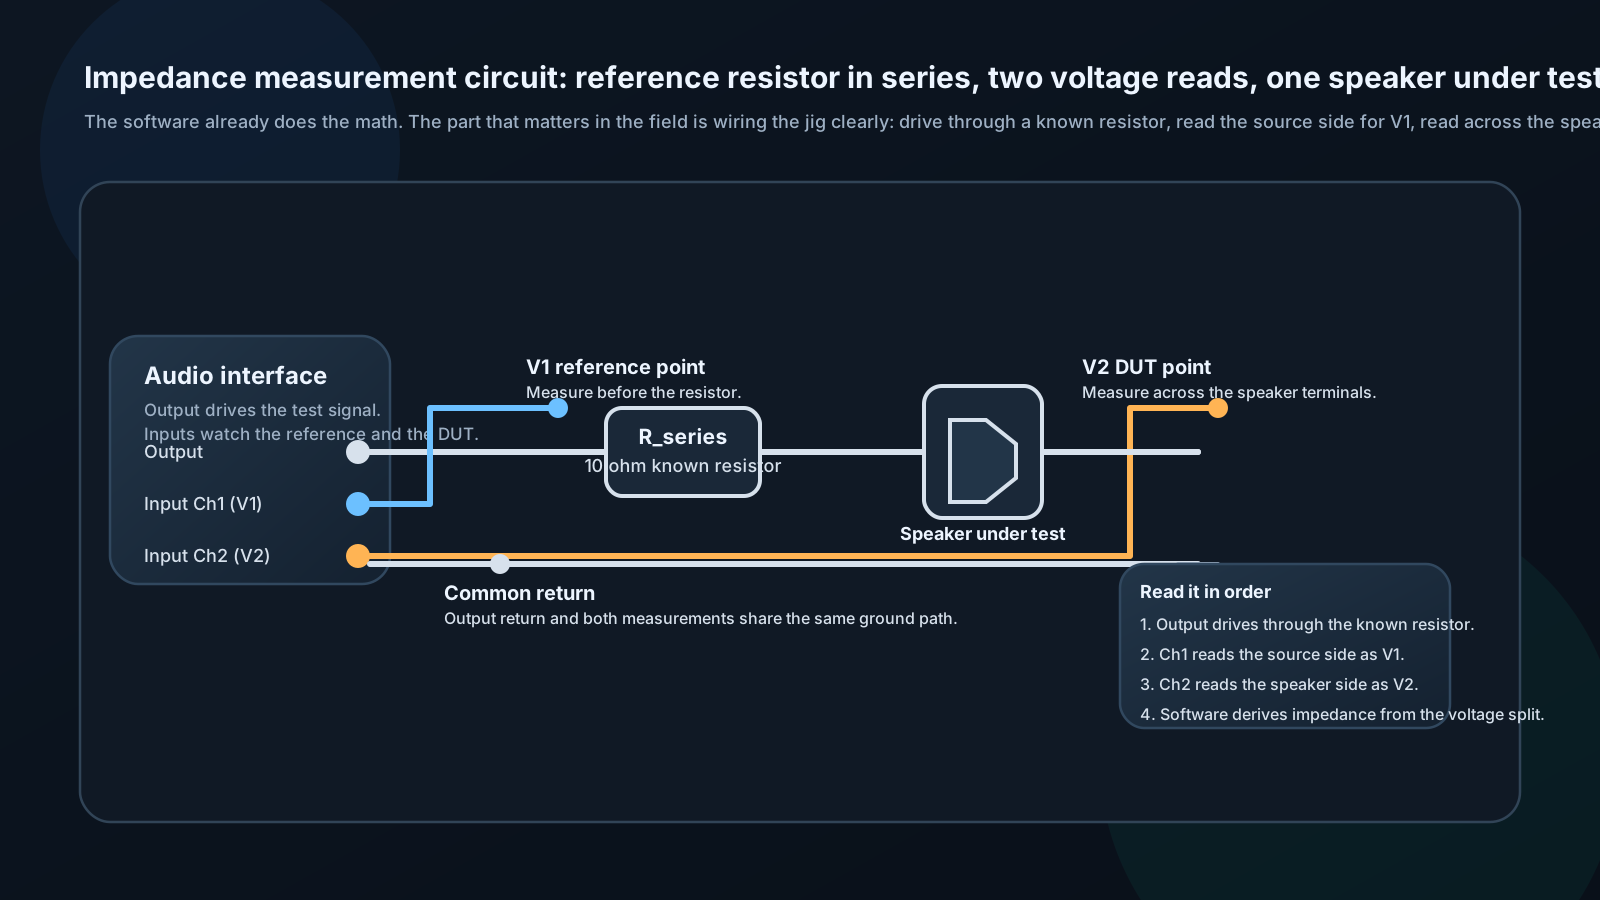
Use impedance measurement when you need resonance, enclosure tuning clues, or confirmation that the load behaves the way you think it does.
Use distortion testing when output level alone is not enough. The clean question is not just "how loud?" but "how loud before the signal gets ugly?"
For most practical amplifier checks, measure supply voltage, supply current, and speaker output voltage with repeatable conditions. That is usually more useful than pretending the load is simple when it is not.
Worked example: if your before/after graph changes by 4 dB at 70 Hz, but the mic position or sweep level also changed, the measurement is not good enough to prove the tuning move helped. Repeatable setup beats a dramatic screenshot.